Dashboard — your day at a glance
The first screen after login. Everything an owner checks at closing time, live.
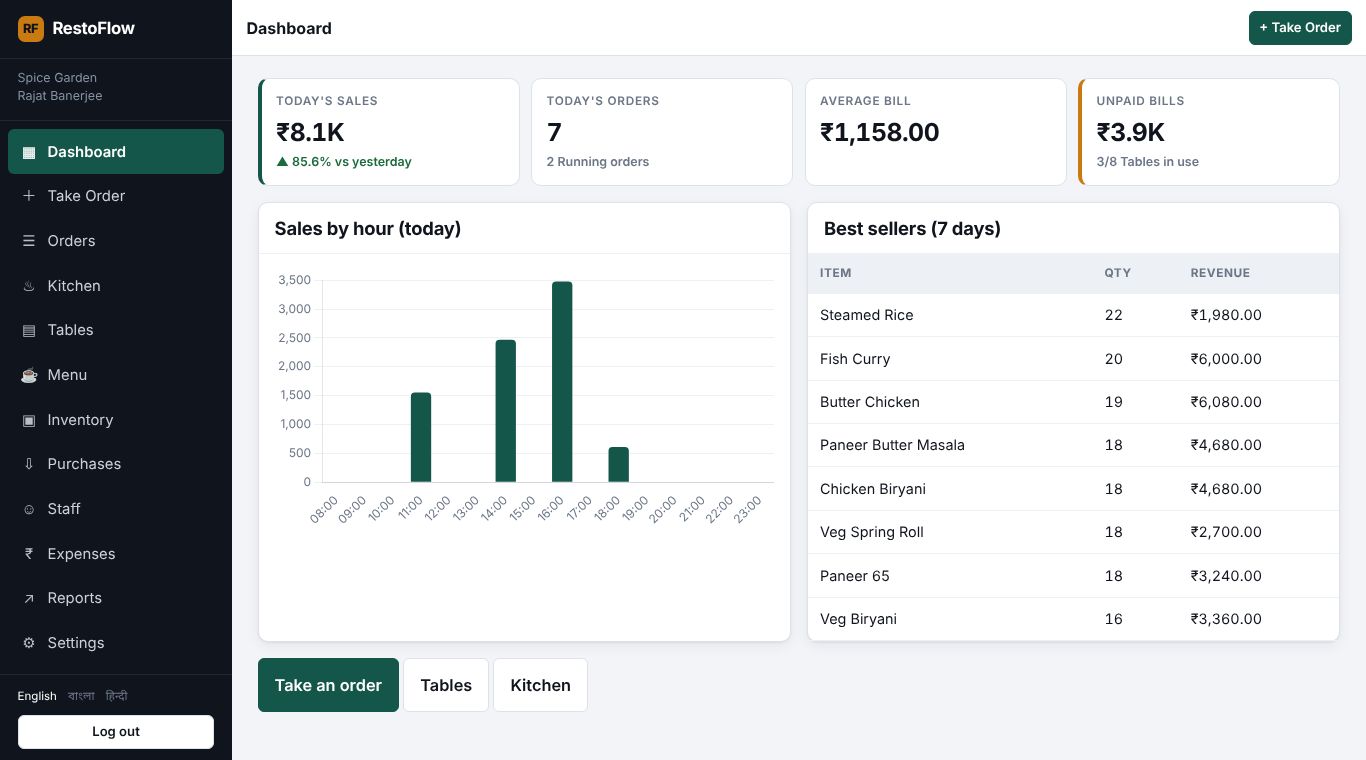
- Today’s sales — Money collected today, with a comparison to yesterday. Green arrow means you are ahead.
- Unpaid bills — Bills not settled yet and how many tables are in use. Chase these before closing.
- Best sellers — Your top dishes over the last 7 days — know what to stock and what to push.
- Take Order — Jump straight to the POS screen from anywhere in the app.
- Change language — Switch between English, বাংলা and हिन्दी any time. It is remembered for your next visit.
Language — Bengali and Hindi screens
Every screen your waiters and cooks use is available in three languages. This is the same dashboard, switched to Bengali.
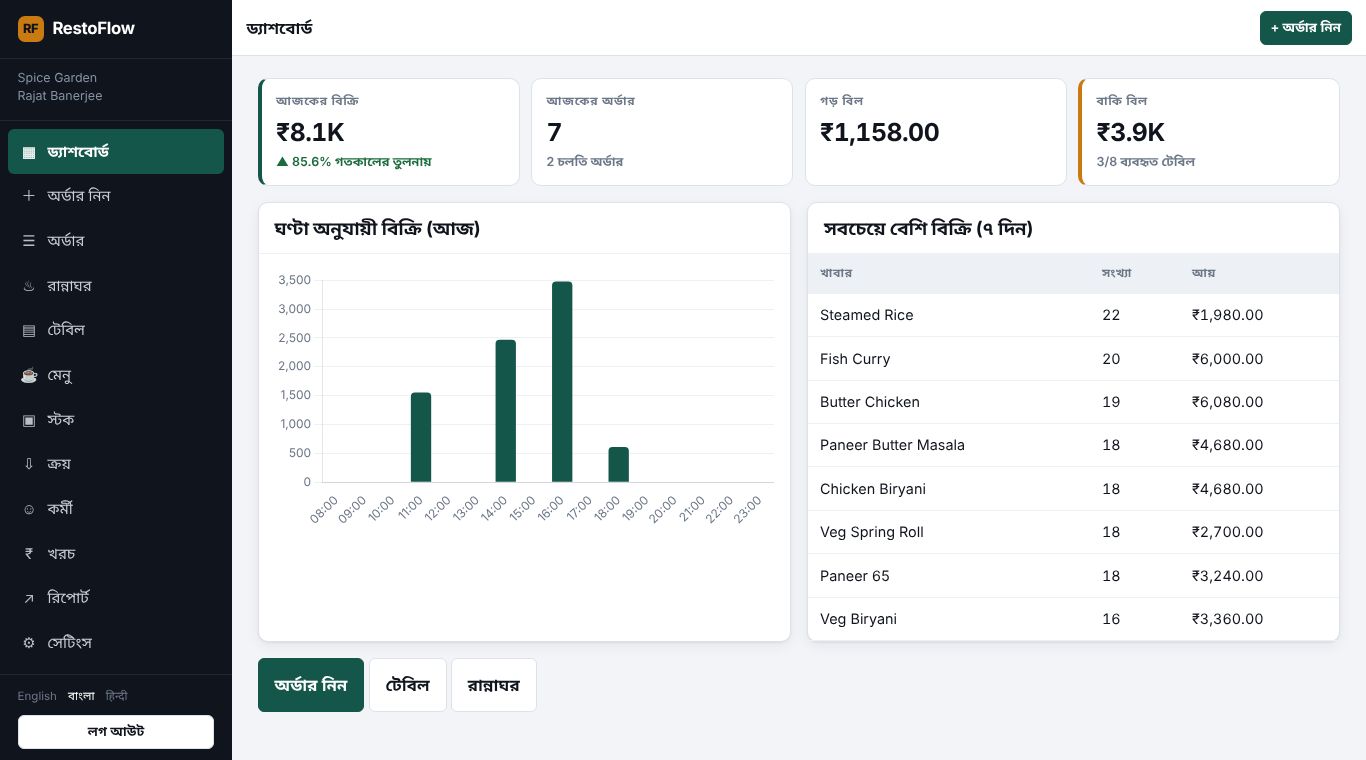
- Language links — Tap English, বাংলা or हिन्दी at the bottom of the menu. The whole app changes at once.
Tables — floor plan and status
See every table at once. Green is free, red is occupied, amber is reserved.
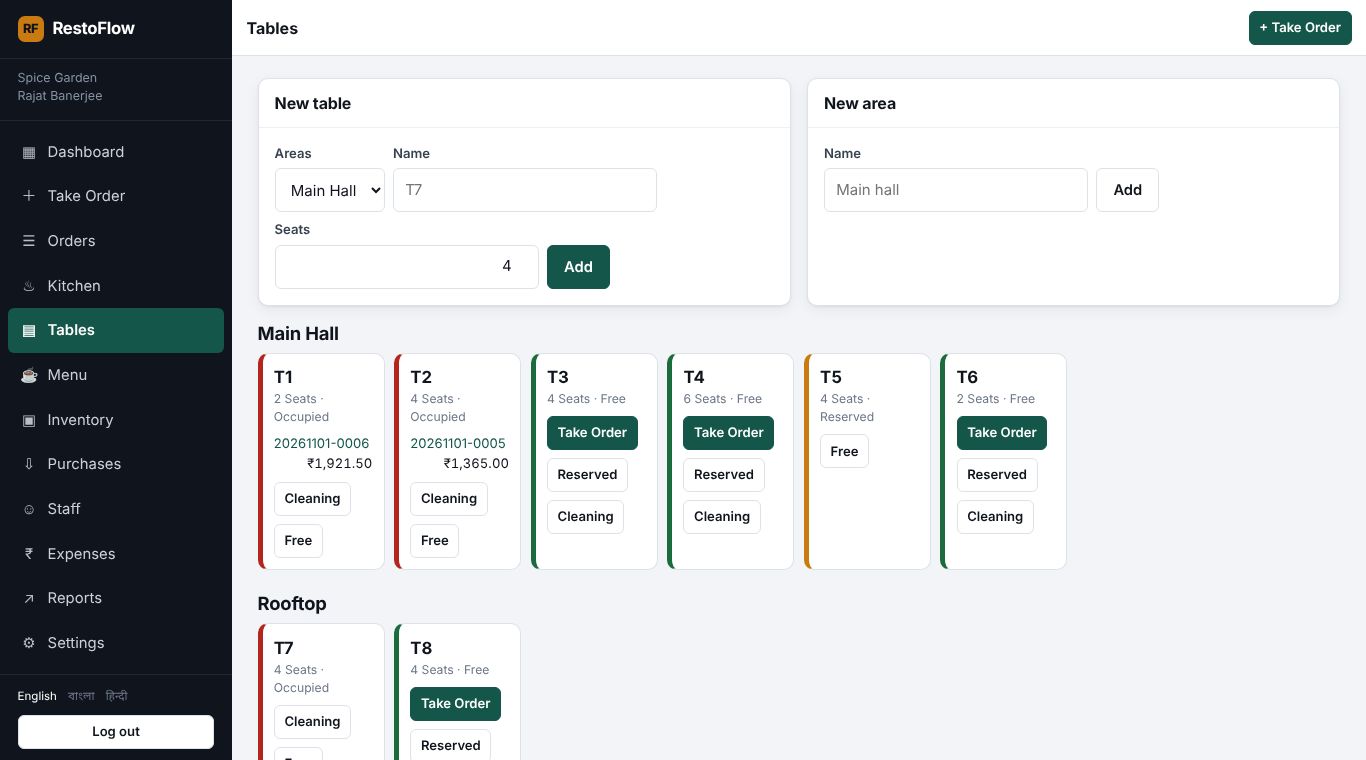
- Add tables and areas — Match RestoFlow to your real seating: add a table with its seats, or a new area such as Rooftop.
- Start an order — On a free table, tap Take Order to open the POS for that table.
- Running order — An occupied table shows its order number and live total. Tap to open the order.
- Change status — Mark a table Cleaning, Reserved or Free by hand when guests leave or book ahead.
Take an order (POS)
Built for a waiter’s thumb. Tap dishes, pick the table, send. GST is worked out for you.
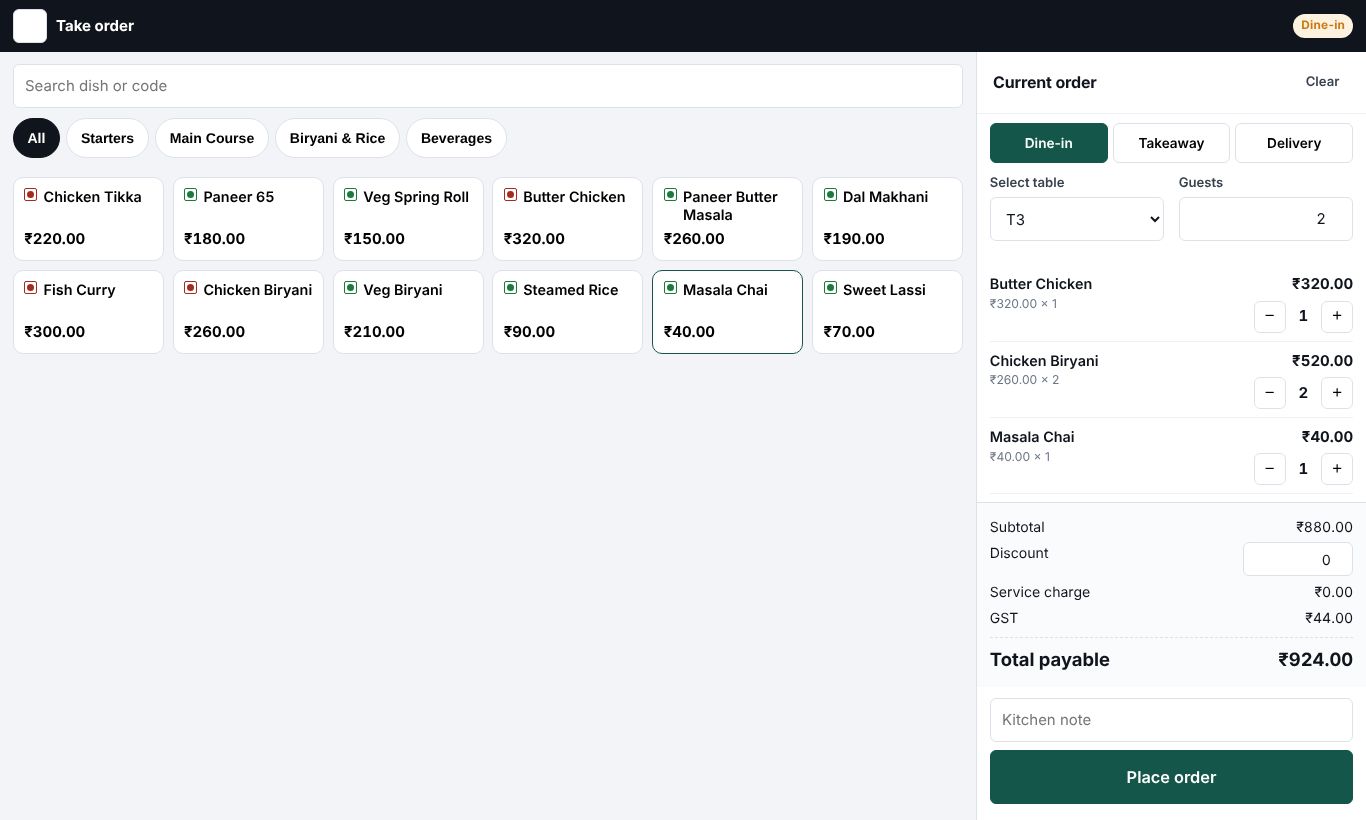
- Menu categories — Filter the menu by category so a long list never slows you down.
- Search — Type part of a dish name or its code to find it instantly.
- Tap a dish — Each tap adds one. Red dot is non-veg, green dot is veg. Use + and − on the right to change quantity.
- Dine-in, takeaway or delivery — Pick the order type. For dine-in, choose the table just below.
- Live total — Subtotal, discount, service charge and GST update as you add items. No mental maths at the table.
- Place order — Sends the order to the kitchen screen immediately — nobody shouts across the pass.
Kitchen display
Every sent order appears here as a ticket. A dark screen that works on any old tablet.
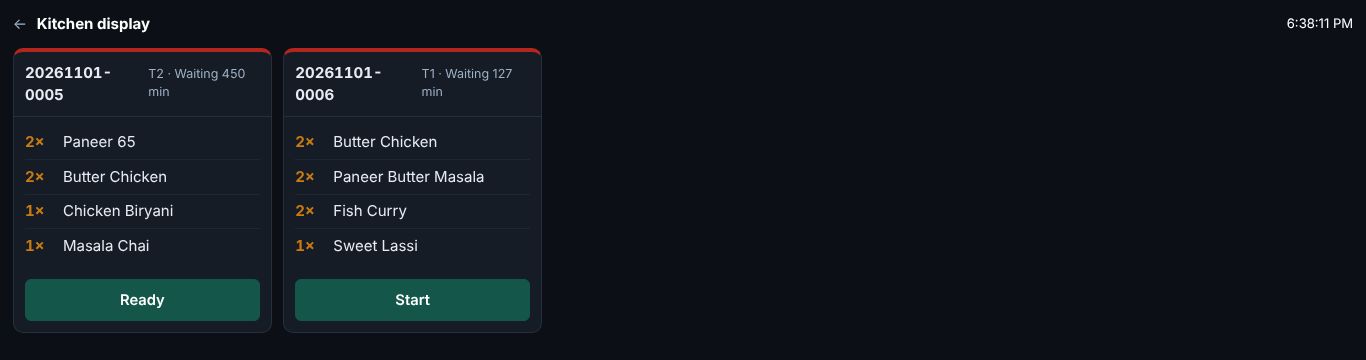
- Order ticket — Order number, table and how long it has been waiting. A red top edge means it needs attention.
- Start — Tap when the cook begins. The waiter sees the status change.
- Ready — Tap when the food is ready to go out. The table view and the waiter update instantly.
Orders — every bill in one list
Search past and running orders, see who is unpaid, and open any one.
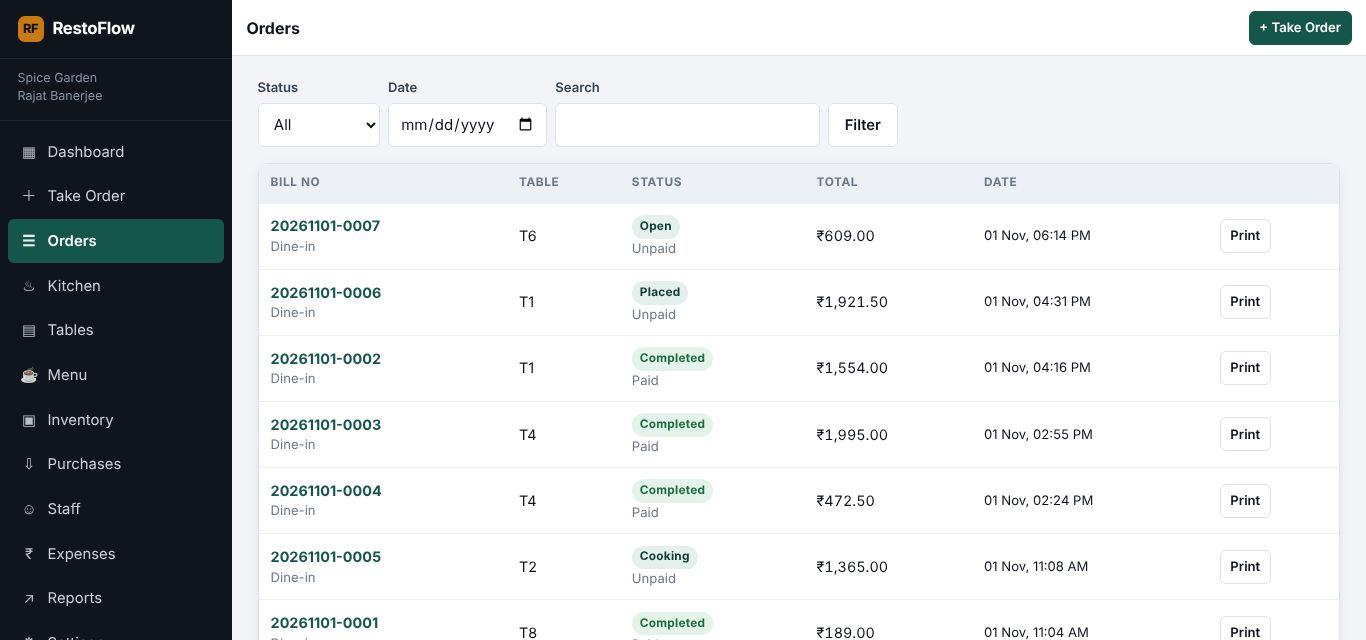
- Order list — Each row shows the order number, table, status and amount. Tap a row to open it.
Order detail — print and take payment
Print the kitchen ticket or customer bill and settle payment: cash, card or UPI.
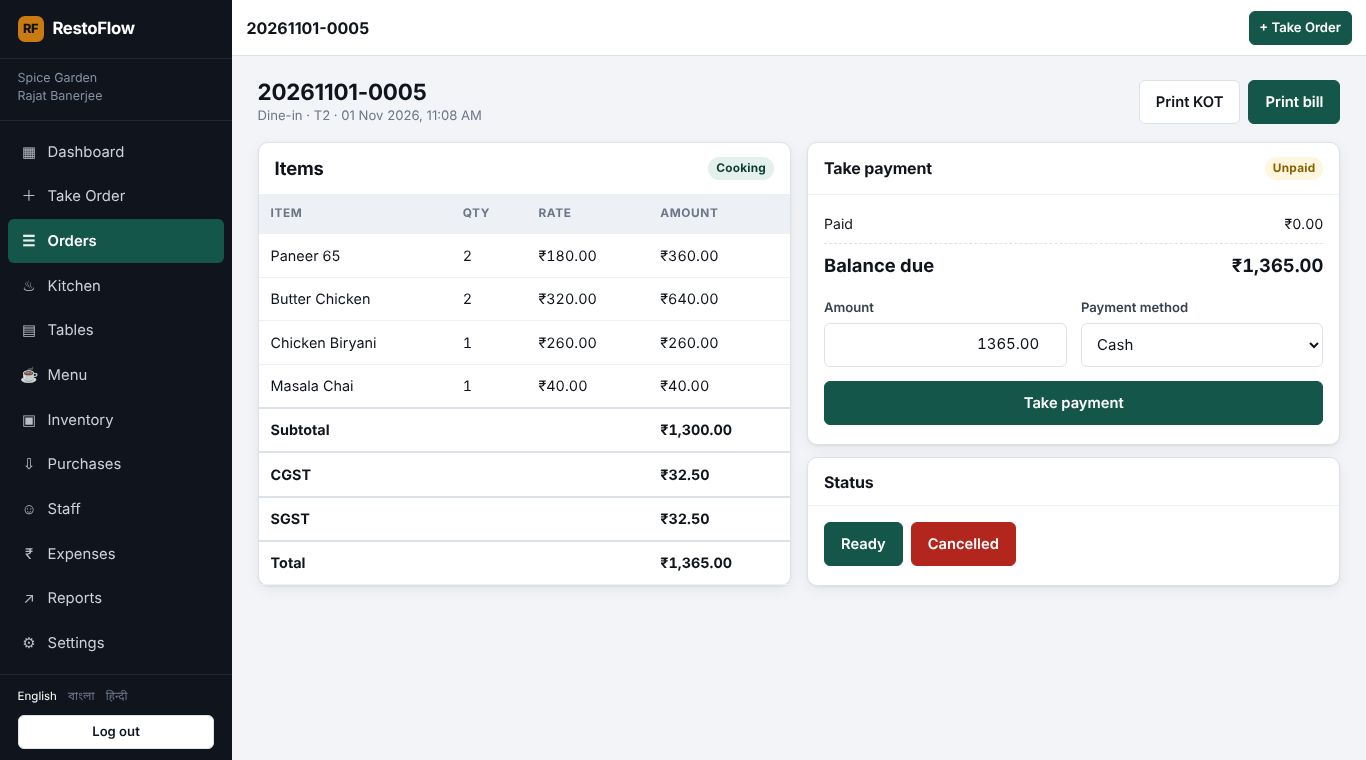
- Print KOT — Kitchen order ticket — items only, no prices, by design.
- Print bill — Opens the customer bill with GST split and a UPI QR code.
- Take payment — Enter the amount and method. Part-payments are supported; the balance stays on the order.
The customer bill with UPI QR
Prints on any thermal or normal printer. Customers scan the QR and pay you directly — the exact due amount is already filled in.
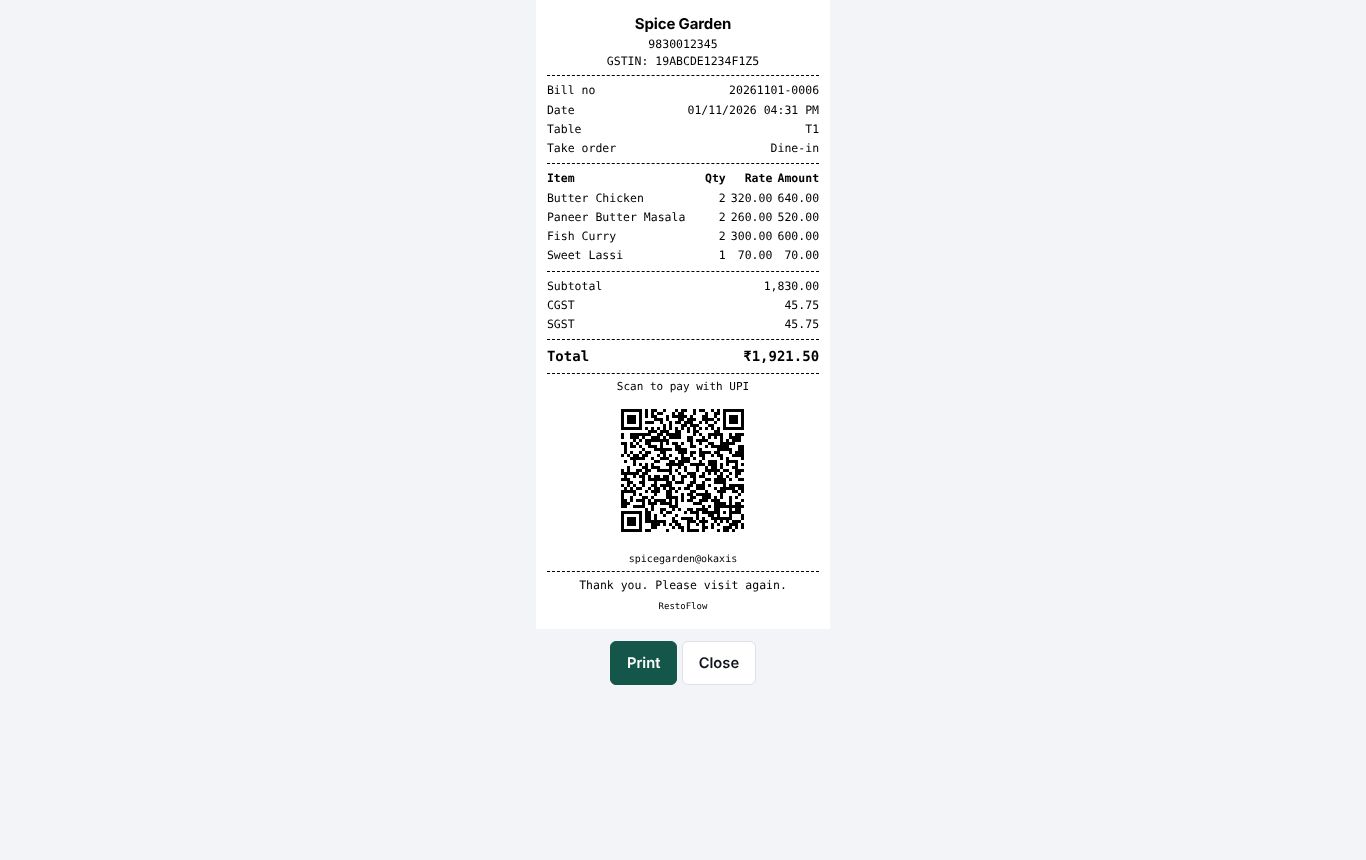
- Total with GST — CGST and SGST (or IGST) are shown separately, ready for your accountant.
- UPI QR — Appears when you have saved your UPI ID in Settings and the bill still has an amount due.
Menu — dishes, prices and GST
Set up your dishes once. Change a price and it applies to new orders straight away.
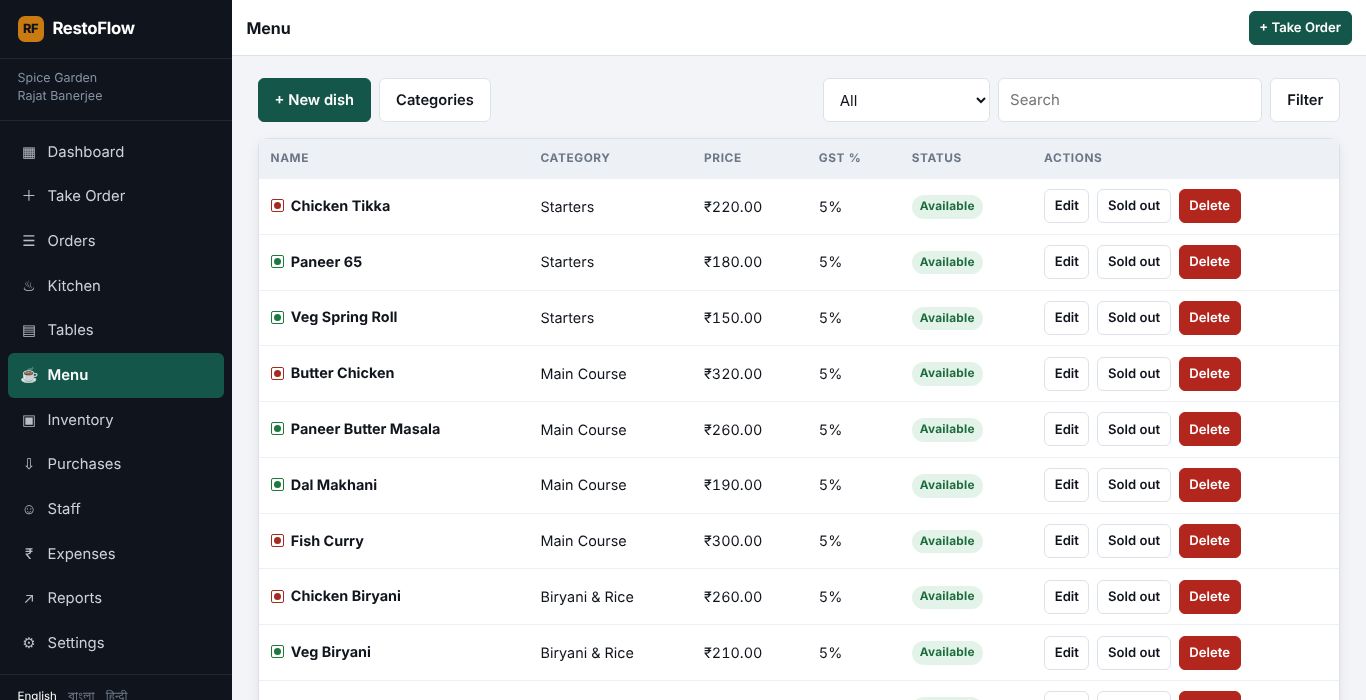
- Add a dish — Name, category, price, GST rate, veg or non-veg — and the recipe if you track stock.
- Your dishes — Switch a dish off when it runs out so waiters cannot sell it.
Inventory — stock that updates itself
Sell a plate and its ingredients are deducted from stock automatically.
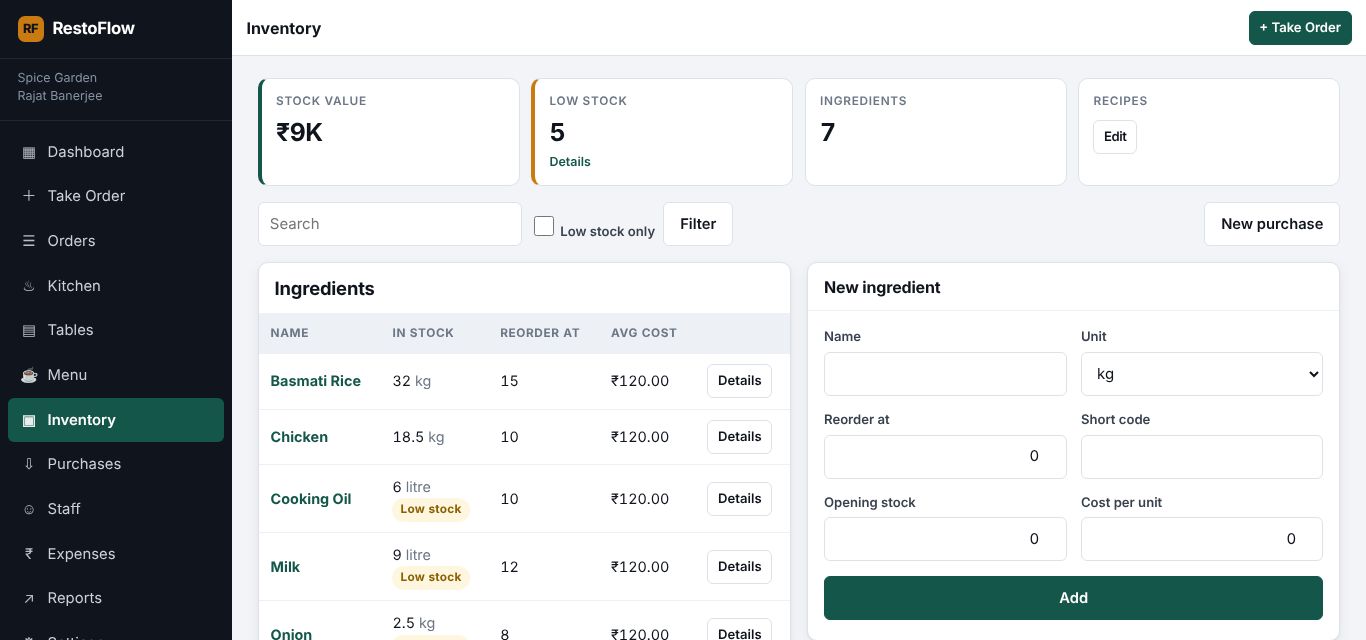
- Current stock — Quantity on hand and the level at which you want to reorder.
- Low stock — Items below their reorder level are flagged so you find out before dinner, not during it.
Expenses
Log rent, groceries, salaries and bills. They feed straight into your profit and loss.
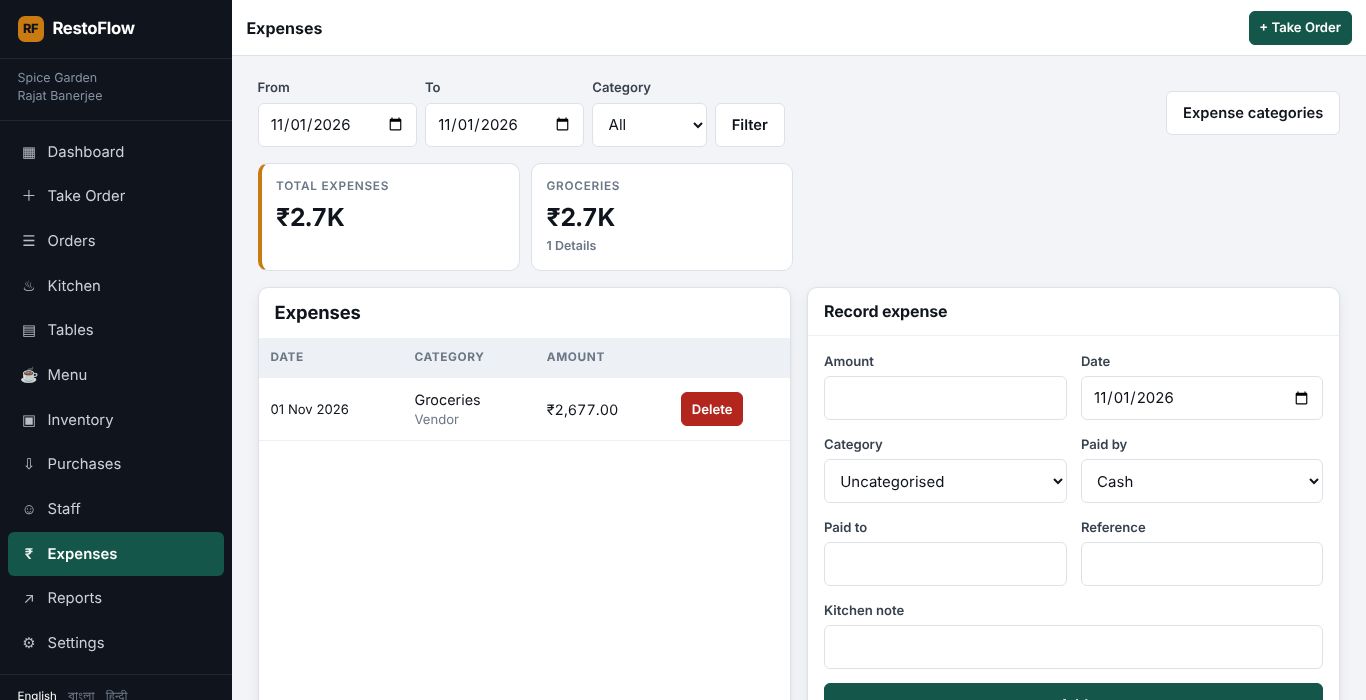
- Expense list — Purchases and salaries you record elsewhere appear here too, so nothing is counted twice.
Reports and Profit & Loss
Sales for any date range, and what you really made after expenses.
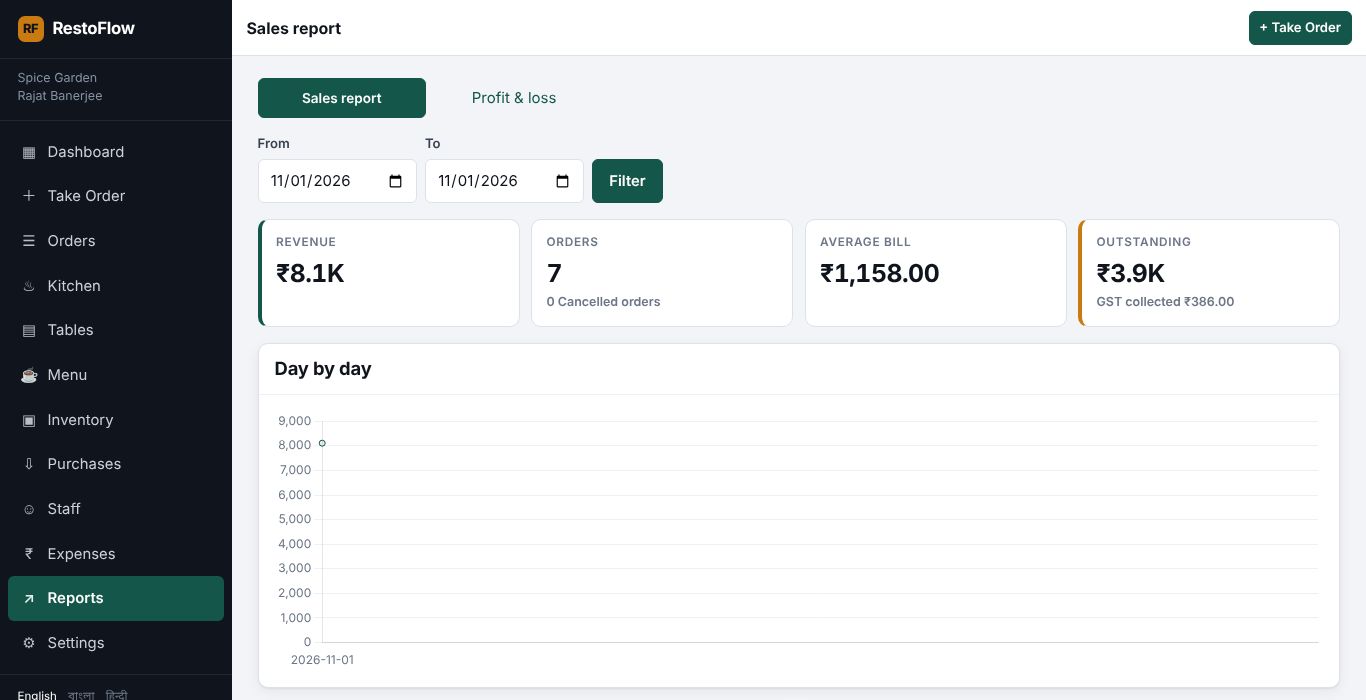
- Date range — Pick From and To, then Filter. Today, this week, this month — whatever you need.
- Revenue and bills — Revenue, order count, average bill, GST collected and outstanding dues.
- Profit & Loss — Switch here for revenue minus expenses, day by day — your real profit, not just what you billed.
Settings — GST, UPI and language
Set these once and every bill carries them.
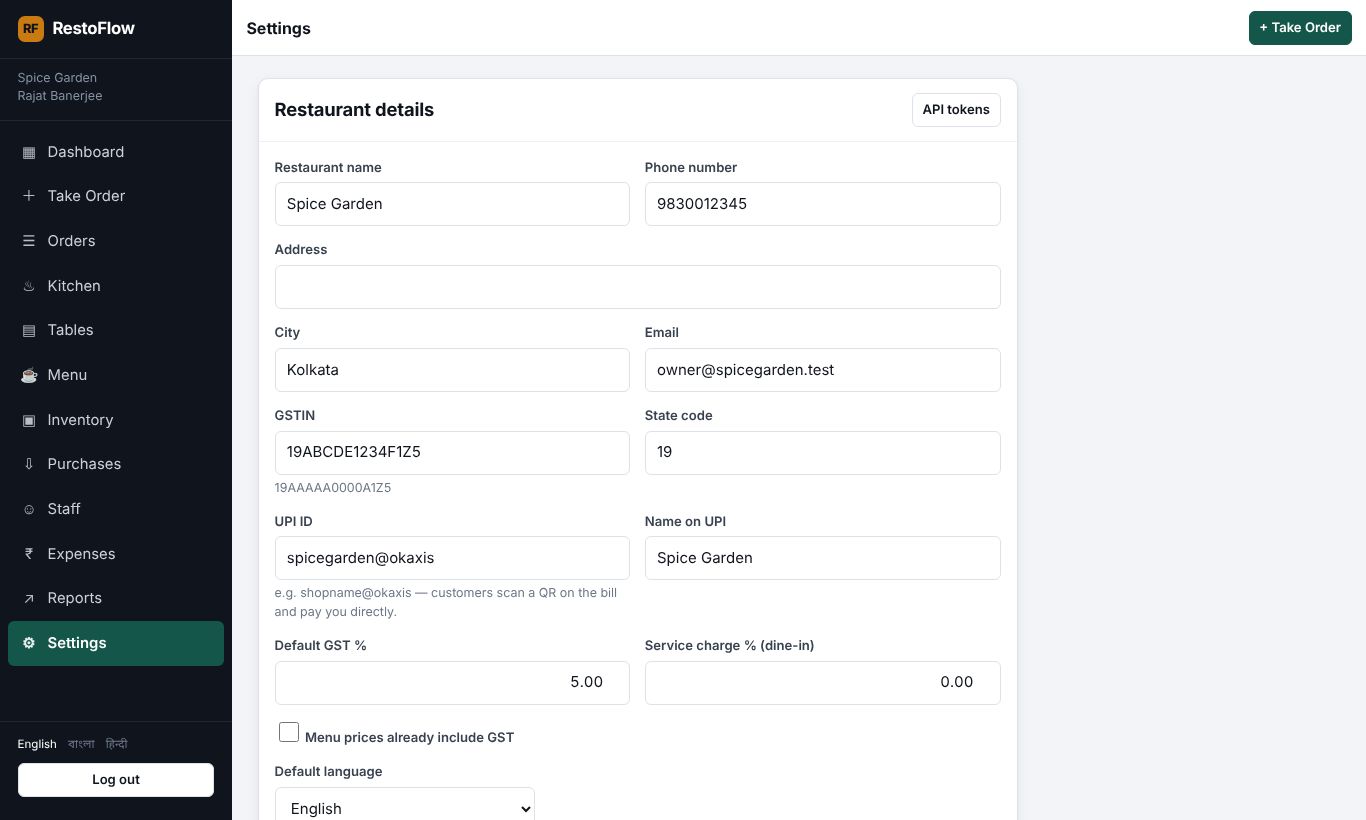
- GSTIN — Your GST number. The state is read from it to decide CGST + SGST or IGST.
- UPI ID — Your own UPI ID. This is what puts the pay-by-QR code on every bill.
- Default language — The language new staff screens start in.